Chocolate-Covered Apple Pops
Highlighted under: Sweet Treats & Homemade Desserts
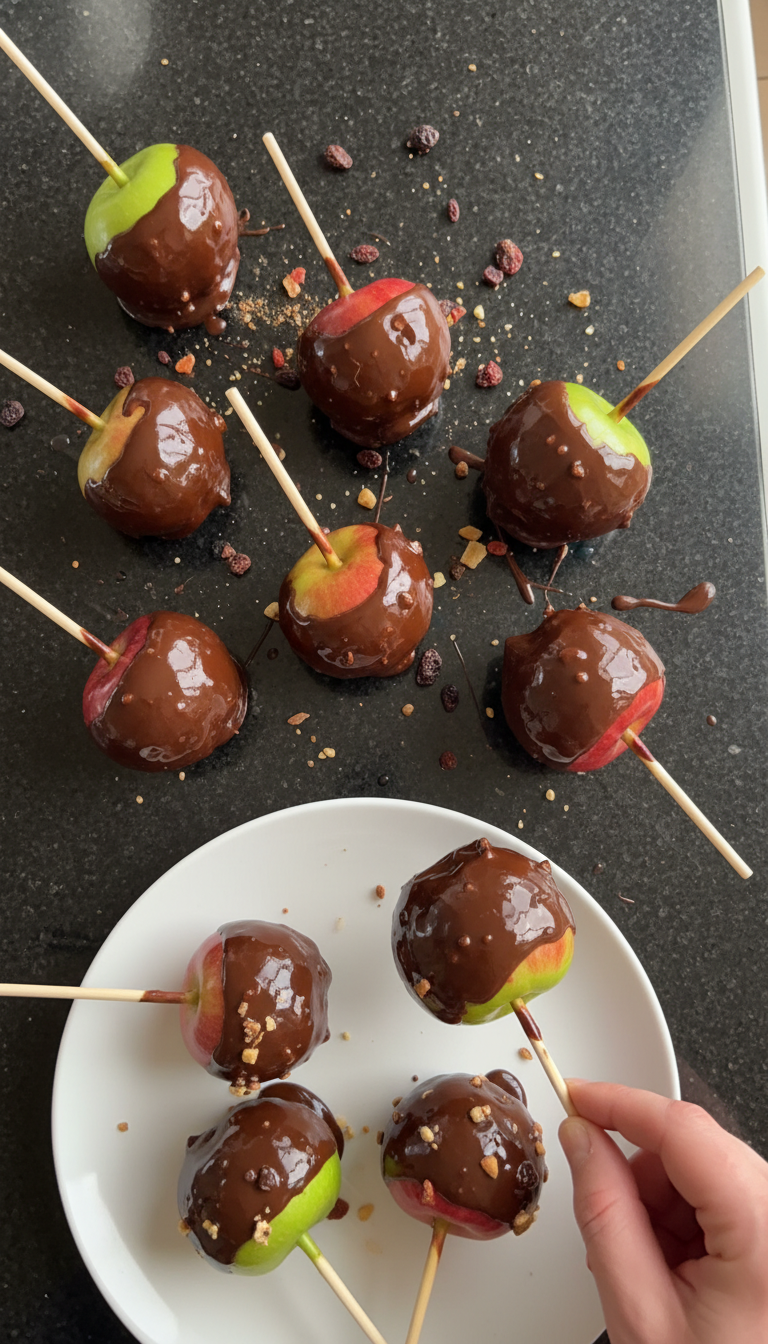
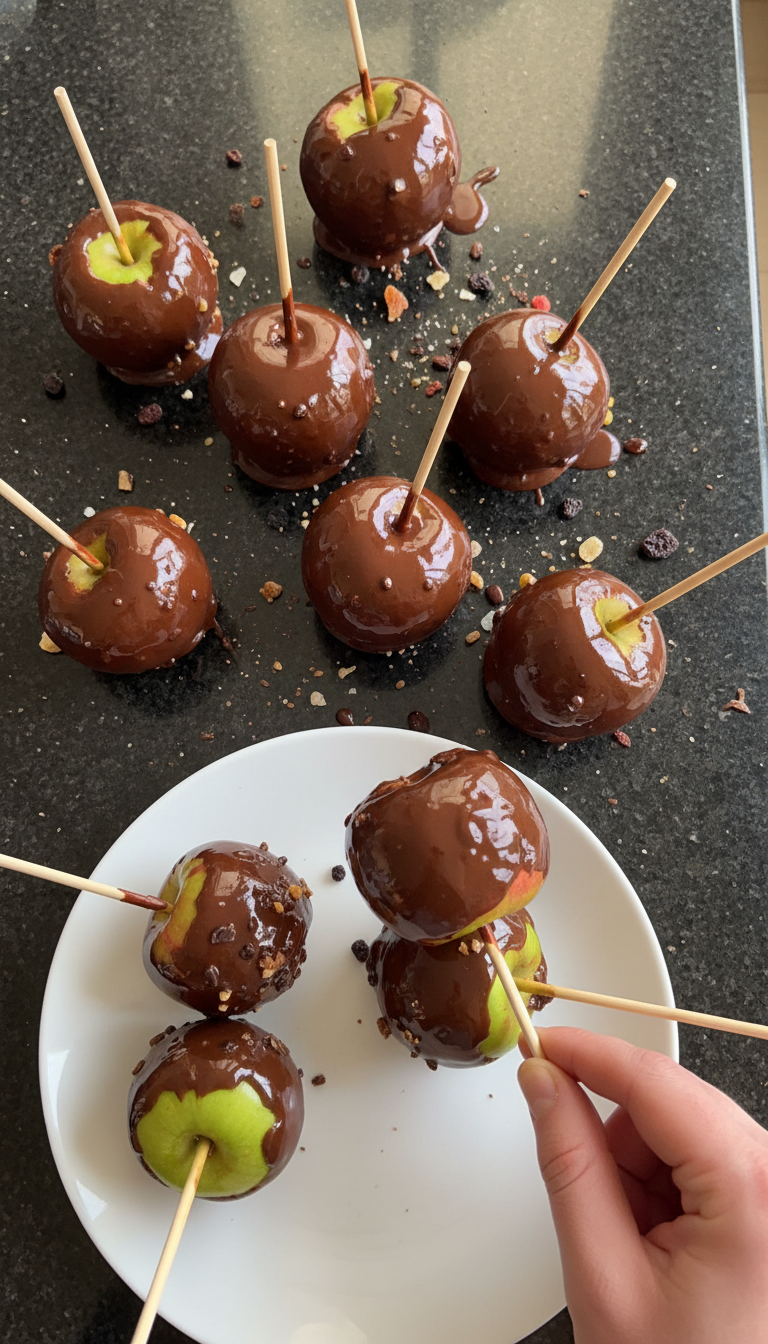
I absolutely adore making these Chocolate-Covered Apple Pops whenever I have a gathering. The combination of sweet, crisp apples and rich chocolate is always a crowd-pleaser! Not only are they easy to make, but they also offer a fun way to indulge without feeling too guilty. I love experimenting with different toppings like crushed nuts or sprinkles, which adds a personal touch. These pops are perfect for kids and adults alike – a delightful treat that brings smiles all around!
When I first tried making Chocolate-Covered Apple Pops, I was pleasantly surprised by how quickly they came together. I found that using apples that are firm and slightly tart balances the sweetness of the chocolate perfectly. The first batch disappeared in no time at a friend's party, and they were a hit with both kids and adults!
I recommend melting high-quality chocolate for the coating, as it really enhances the flavor. A tip I discovered is to tap the pops lightly after dipping to let the excess chocolate drip off, ensuring a clean and attractive finish. These pops are not just treats; they’re an experience in every bite!
Why You'll Love These Pops
- A fun and healthy twist on a classic dessert
- Endless topping options to personalize each pop
- Perfect for parties, picnics, or an afternoon treat
Choosing the Right Apples
When making Chocolate-Covered Apple Pops, the type of apple you choose can significantly affect the flavor and texture of the finished treat. I recommend using crisp varieties like Granny Smith or Honeycrisp for their balanced sweetness and tang. These apples not only hold up well against the melting chocolate, but their firm texture ensures a satisfying crunch with each bite.
If you're feeling adventurous, consider experimenting with other apple types like Fuji or Gala. However, be mindful that softer apples may not provide the same satisfying bite, which can lead to a mushier pop. Regardless of the variety, selecting apples that are firm and fresh will yield the best results.
Perfecting Your Chocolate Technique
The melting process is crucial for achieving a smooth and glossy chocolate coating. Using a microwave-safe bowl, I recommend starting with chocolate chips mixed with a tablespoon of coconut oil. The oil helps to create a thinner consistency, allowing for better coverage while adding a slight sheen to the chocolate. Heat in short increments, stirring frequently to prevent burning—aim for a total of 1 to 2 minutes for optimal melting. The chocolate should be fully melted and free of lumps.
If you find your chocolate is too thick after melting, you can add a little more coconut oil or even a splash of milk to loosen it up. Conversely, if the chocolate is too runny, consider refrigerating it briefly before dipping to achieve the ideal viscosity. This attention to chocolate texture will greatly enhance the final appearance and taste of your pops.
Creating Variations and Topping Ideas
One of the best aspects of these Chocolate-Covered Apple Pops is the ability to customize them with various toppings. After dipping the apples in melted chocolate, try rolling or sprinkling them with toppings like crushed nuts, colorful sprinkles, or even shredded coconut while the chocolate is still wet. This not only enhances the visual appeal but also adds delightful textures and flavors that contrast beautifully with the chocolate and apple.
For a more grown-up twist, consider using flavored chocolates or adding a pinch of sea salt after dipping. You could also drizzle white chocolate over the dark chocolate layer for a gorgeous presentation. Feel free to experiment with seasonal toppings such as crushed peppermint candies during the holidays or a sprinkle of cinnamon sugar for a fall-inspired treat.
Ingredients
Gather your ingredients to create these delightful pops!
Ingredients
- 2 large apples (green or red)
- 1 cup dark chocolate chips
- 1 tablespoon coconut oil
- Toppings: crushed nuts, sprinkles, or shredded coconut (optional)
- Popsicle sticks
Make sure everything is prepared before you start the dipping process!
Instructions
Follow these steps for an easy preparation of Chocolate-Covered Apple Pops.
Prepare the Apples
Core the apples and slice them into wedges or keep them whole. Insert a popsicle stick into the center of each apple.
Melt the Chocolate
In a microwave-safe bowl, combine the chocolate chips and coconut oil. Heat in 30-second increments, stirring until smooth and fully melted.
Dip the Apples
Dip each apple pop into the melted chocolate, ensuring it’s fully coated. Allow any excess chocolate to drip off before placing it on a lined baking sheet.
Add Toppings
If using toppings, sprinkle them over the chocolate-coated apples immediately before the chocolate hardens.
Chill and Serve
Refrigerate the pops for about 10 minutes to set the chocolate, then serve and enjoy!
Enjoy your homemade Chocolate-Covered Apple Pops!
Pro Tips
- For the best results, use apples that are firm and crisp. Experiment with different types of chocolate, such as milk or white chocolate, for varied flavors. Don't hesitate to mix up your toppings for a more festive look.
Storage and Make-Ahead Options
If you're planning ahead for a gathering, these Chocolate-Covered Apple Pops can be made in advance. Once the chocolate has set in the refrigerator, store them in an airtight container in a cool, dry place for up to 3 days. If you want to keep them for longer, you can freeze the pops. Just make sure they are well-wrapped to prevent freezer burn, and they should last for about a month.
To serve, simply thaw the frozen pops in the refrigerator for a few hours before enjoying them. Be cautious when freezing because the texture might change slightly, losing some crunch. For the freshest taste, I recommend enjoying them within a few days of preparation.
Troubleshooting Common Issues
Sometimes, the chocolate might not adhere properly to the apples. This can happen if the apples are too wet or oily, so be sure to dry them thoroughly after washing. Additionally, if your coating seems to crack as it sets, it might be due to the chocolate cooling too quickly. In this case, allow the melted chocolate to cool slightly before dipping the apples to achieve a smoother finish.
If you encounter difficulty inserting the popsicle stick, you can warm the stick slightly with your hands or dip it in the chocolate first. This way, the stick adheres better to the apple and makes for an easier handling experience. Keeping these tips in mind will help ensure your Chocolate-Covered Apple Pops turn out perfectly every time.
Serving Suggestions
These Chocolate-Covered Apple Pops serve beautifully on a platter, making them ideal for parties and gatherings. To add a decorative touch, consider arranging them in a tall cup or container filled with rice, beans, or floral foam that holds the pops upright. This presentation not only displays the treats attractively but also makes it easy for guests to grab one during the festivities.
For a themed event, you might customize the pops further by matching the toppings to your color scheme. Alternatively, drizzle different flavors of melted chocolate over the pops for a gourmet feel. Serving them alongside a fruit dip or warm caramel sauce can also create a delightful experience that will impress your guests.
Questions About Recipes
→ Can I use other fruits instead of apples?
Yes! Bananas, strawberries, or pineapple chunks work wonderfully as well.
→ How long can I store the pops?
They can be stored in the refrigerator for up to 3 days, but they're best enjoyed fresh.
→ Can I make these pops vegan?
Absolutely! Use dairy-free chocolate chips and ensure any toppings are also vegan-friendly.
→ What are some creative toppings I can use?
Consider using crushed pretzels, mini chocolate chips, or even a drizzle of caramel for a delicious twist!
Chocolate-Covered Apple Pops
Created by: The Pantrytrail Team
Recipe Type: Sweet Treats & Homemade Desserts
Skill Level: Easy
Final Quantity: 12 pops
What You'll Need
Ingredients
- 2 large apples (green or red)
- 1 cup dark chocolate chips
- 1 tablespoon coconut oil
- Toppings: crushed nuts, sprinkles, or shredded coconut (optional)
- Popsicle sticks
How-To Steps
Core the apples and slice them into wedges or keep them whole. Insert a popsicle stick into the center of each apple.
In a microwave-safe bowl, combine the chocolate chips and coconut oil. Heat in 30-second increments, stirring until smooth and fully melted.
Dip each apple pop into the melted chocolate, ensuring it’s fully coated. Allow any excess chocolate to drip off before placing it on a lined baking sheet.
If using toppings, sprinkle them over the chocolate-coated apples immediately before the chocolate hardens.
Refrigerate the pops for about 10 minutes to set the chocolate, then serve and enjoy!
Extra Tips
- For the best results, use apples that are firm and crisp. Experiment with different types of chocolate, such as milk or white chocolate, for varied flavors. Don't hesitate to mix up your toppings for a more festive look.
Nutritional Breakdown (Per Serving)
- Calories: 150 kcal
- Total Fat: 8g
- Saturated Fat: 5g
- Cholesterol: 0mg
- Sodium: 5mg
- Total Carbohydrates: 18g
- Dietary Fiber: 2g
- Sugars: 12g
- Protein: 1g